How to Mount Your PC Under Your Desk
Do you want to tidy up your workspace and get your PC up off the ground? Then an under desk PC mount is the solution you’ve been searching for! Perfect for both traditional and standing desks, an under-desk PC mount will securely display any large form factor PCs in an innovative, organized way.
Installing an Adjustable Under Desk PC Mount
The new Adjustable Under Desk PC Mount from Oeveo is sure to solve many of your PC storage woes by allowing you to mount it directly under your desk. No longer will your PC gather dust under your desk or take up space atop it. Not only that, its 360-degree swivel feature allows for easy access to essential cables and buttons without ever having to remove your PC.

Luckily, the Adjustable Under Desk PC Mount is so simple to install that anyone can do it. All you need are the included fasteners, a few basic tools, and a bit of time, and you will be on your way to an unbeatable desk setup.
Materials:
To install the Adjustable Under Desk PC Mount, you will need:
The fasteners provided
Step One: Choosing a Location
Determine where you want your Adjustable Under Desk PC Mount based on your current office and desk setup. You want to be sure your PC won’t be in the way but is easily accessible. Also, you must choose a sturdy structure to mount your device to, whether that’s a wooden desktop, metal frame, or something else.
Step Two: Preparing to Mount
Hold the PC mount up to the location you wish to install it and mark the holes under your desk. Also, check to make sure the included screws won’t pop through the other side of your desk by holding them up to the edge. If the screws are too long, either locate shorter ones or thicker washers.
Step Three: If Necessary, Drill Pilot Holes
You can prep the installation site by pre-drilling into the holes you marked using a 3/16” drill bit than the screws. Then if you’re using wall anchors, insert them into the holes you’ve drilled.
Step Four: Assemble the Top Parts of the PC Mount
Next, you want to attach Part 1 and Part 2 by fastening the included ⅜” hex lag bolt and lock nut.
Step Five: Attaching the PC Mount to Your Desk
Fasten the PC mount to the underside of your desk by holding it up to your pilot holes and screwing the first fastener through the hole into the marked spot. For best results, screw into the hole diagonal to the first next. Repeat until all four screws are securely in place.
Step Six: Attaching the Adjustable PC Base to the Mount
Now it’s time to attach the base to the mount. You will see a series of holes along the edges of both Part 1 and Part 4 of the tower mount.
Step Seven: Adding the Tipping Bracket
Slide Part 3, the tipping bracket, onto the bottom of Part 4 so that the lip is pointing up. Then use the hand fasteners to attach the base plate according to the width of the computer in the same fashion as the base to ensure your PC is safe and secure.
Step Eight: Placing Your Computer in the Mount
You did it! Now all you have to do is slide your computer onto the Adjustable Under Desk PC Mount, and you’ll have a neat and secure workstation.
Installing a Titan Adjustable Tower Mount
Another excellent under desk PC mount by Oeveo, the Titan Adjustable Tower Mount, is even easier to install. The Titan is the perfect PC mount to take your gamer station to the next level by displaying your high-end PC in an attractive yet secure way. The main difference from the Adjustable Under Desk PC Mount is that the Titan cannot swivel.
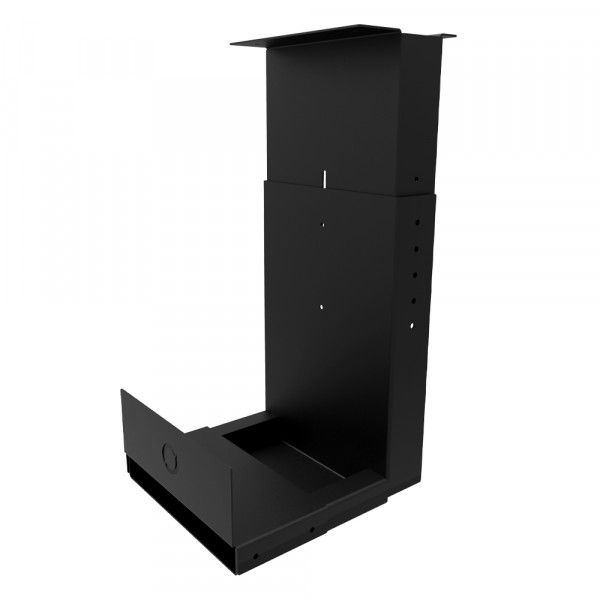
PCs, especially ones with large amounts of processing power, tend to give off a lot of heat. But an under-desk PC mount such as the Titan can help you avoid overheating. Also, being up off the ground will avoid many of the issues associated with dusk getting trapped in your PC. Plus, the Titan is large and durable enough to support even large form factor PCs safely.
Materials
To install the Titan Adjustable Tower Mount, you will need:
Step One: Choosing a Location
Determine where you want your tower mount based on your current office and desk setup. You want to be sure your PC won’t be in the way but is easily accessible. Also, you must choose a sturdy structure to mount your device to, whether that’s a wooden desktop, metal frame, or something else.
Step Two: Preparing to Mount
Hold the tower mount up to the location you wish to install it and mark the holes under your desk. Also, check to make sure the included screws won’t pop through the other side of your desk by holding them up to the edge. If the screws are too long, either locate shorter ones or washers.
Step Three: If Necessary, Drill Pilot Holes
You can prep the installation site by pre-drilling into the holes you marked using a drill bit slightly smaller than the screws. Then if you’re using wall anchors, insert them into the holes you’ve drilled.
Step Four: Attaching the Tower Mount to Your Desk
Fasten the tower mount by holding it up to your pilot holes and screwing in the first fastener. For best results, screw into the hole diagonal to the first next. Repeat until all four screws are securely in place.
Step Five: Attaching the PC Base to the Mount
Now it’s time to attach the base to the mount. You will see a series of holes along the edges of both parts of the tower mount; align the holes at the height necessary for your PC. Then, insert the included fasteners through the desired hole and tighten to attach.
Step Six: Adding the Tipping Bracket
Using the screws and wing nuts left over, attach the tipping bracket in the same fashion to ensure your PC is safe and secure.
Choosing the Right Mount
With any Oeveo mount, you know you’re getting an affordable, sturdy, 100% designed and manufactured in the United States mount that’s built to last. We stand behind our products 100% and want to make sure you have every resource possible when choosing the mount for your Apple and Mac products, Dell Optiplex, Intel Nuc, or another type computer.
Refer to our tech mount selector resource to determine which mount will work best with your office and desk application.
If you’re not sure which product is right for you, or want to inquire about custom solutions, get in touch with our team today. We’re available by phone at 888-416-3836, live chat on our website, or email at support@oeveo.com.